Players
AD+Sign Pro
A Player is a digital representation of a physical AD+Sign Player. They can be managed from the Players page, accessible in the navigation menus.
Managing Players
A list of your displays can be found on the Players page. This list can be searched using the search bar, or filtered using the filter options beside the search bar.
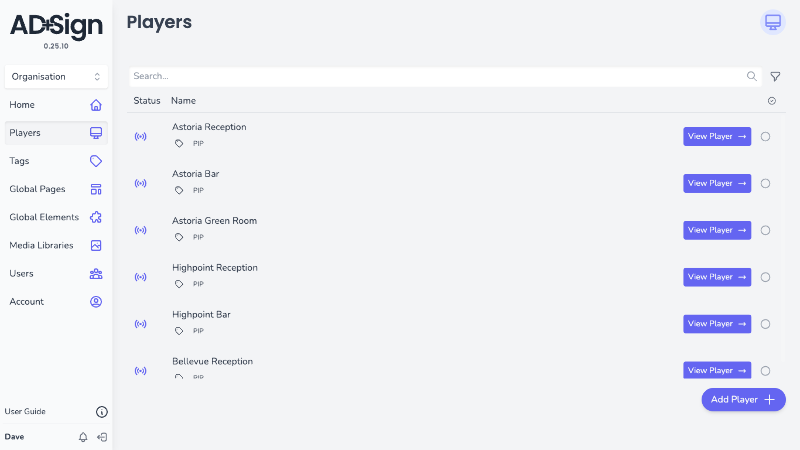
Register a player
When new Players are created in AD+Sign Pro they have not yet been assigned to a physical Player. To start connecting your Player to AD+Sign Pro:
- Setup the Player in 'Cloud Connected' mode.
- During the Registration step of the Player setup, a 6-digit Registration Code will display on-screen.
- Enter your Player's Registration Code into the Registration field in the Players page.
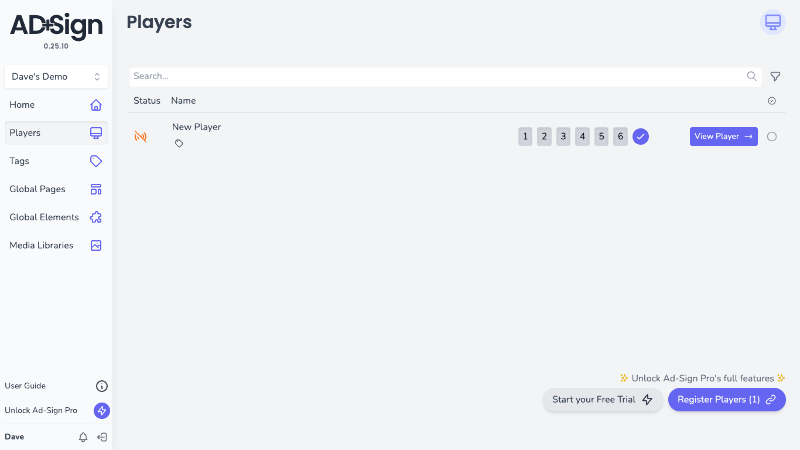
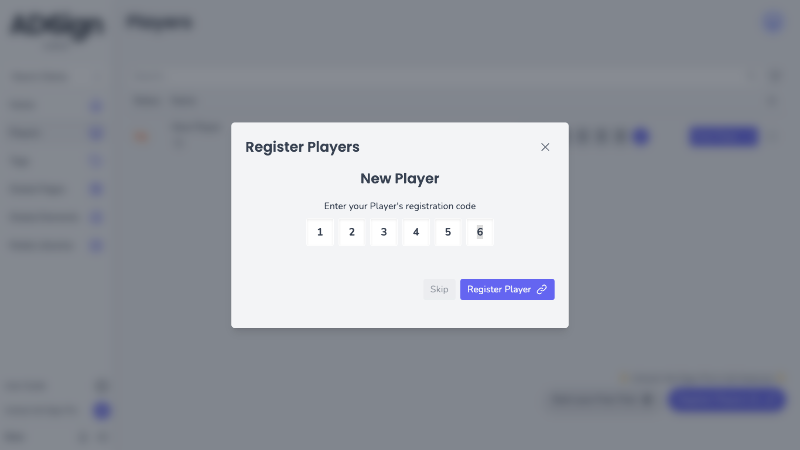
- To register multiple Players click Register Players
- Enter your Players' Registration Codes into the input field and click 'Register Player'.
- Repeat this process for each Player you wish to register.
Once your Player is registered, its online status will update to 'Online' and it will be connected to AD+Sign Pro.
Add a Player
To have more than one Player in your Organisation you will need to upgrade your account from the Free plan to our paid plan.
- Click Start your Free Trial
- Enter the number of Players you wish to add to your Organisation and click 'Start your Trial'
- This will take you to the Billing page where you can enter your payment details and start your 30 day trial
- You will not be charged until the end of your trial period
- You can cancel your trial at any time
- After your Trial is complete, your account will be billed yearly for the number of Players you have added to your Organisation
- Once your payment details have been entered, you will be taken back to the Players page and your Players will be added to your Players List
Viewing a Player
Click View Player on a Player item in the Players list to navigate to its Preview Page.
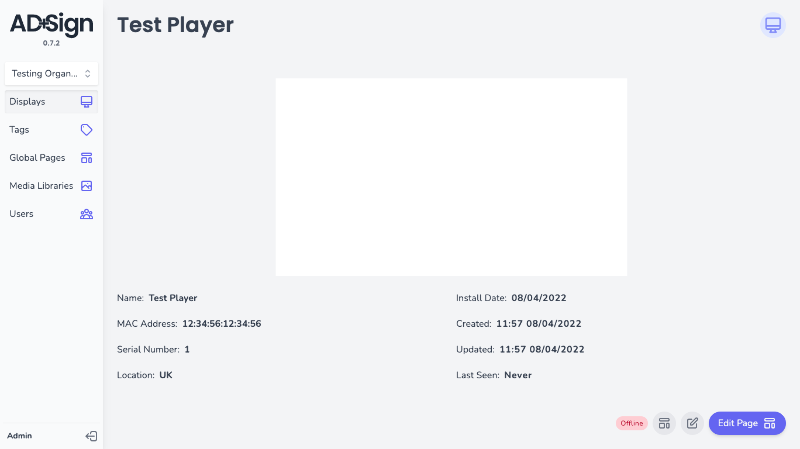
Here you will find a Player's details like Player Status, Serial Number and when it was last seen. In the top half of the screen is a preview of what the Player is showing.
A Player's preview may be blank. This is likely because no content has been configured for it yet.
Editing a Player
- On the Player's Preview Page, click the button
- Click 'Edit Player Details'
- In the Edit Player dialog, you can edit the Player's Name, Location, Serial Number and Install Date.
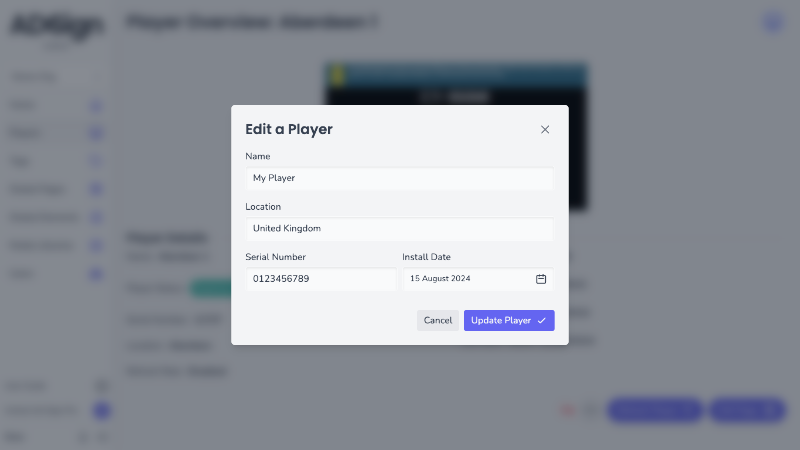
- Once you are happy with your new Player values, click the Update Player button to save your changes.
Assigning a Global Page
- On the Player's Preview Page, click the button
- Click 'Set Page'
- In the Select Page dialog, choose your Global Page from the dropdown list
- Click Select Page to apply this page to the Player
Learn more here: